Photos of locations relevant to the Julia Wallace murder case, including crime scene photos.
—
Click on an image to view in full size.
—
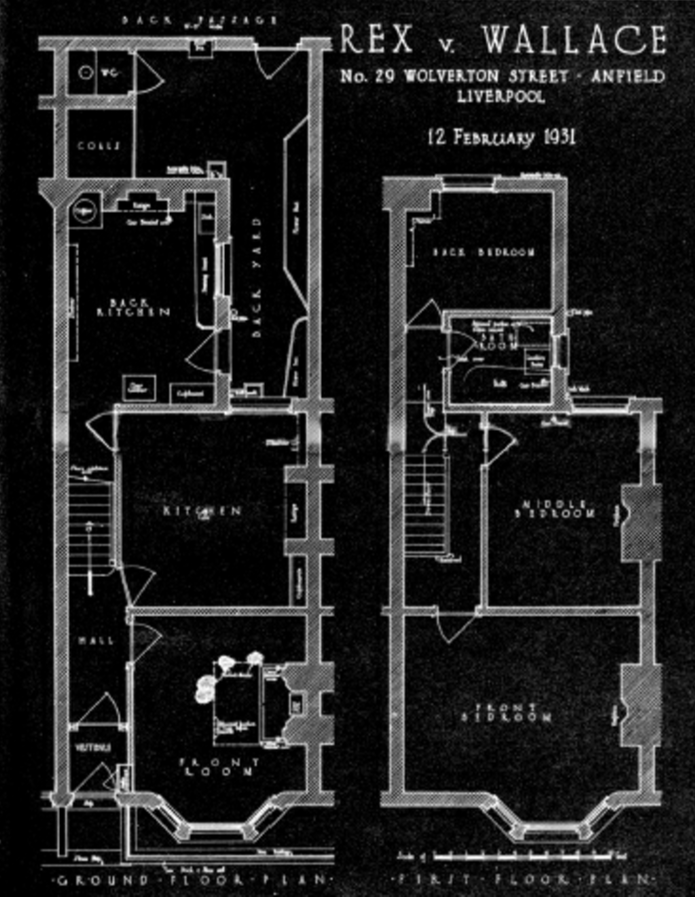
Floor Plan References for 29 Wolverton Street:
Offical (For Trial):
Clearer:
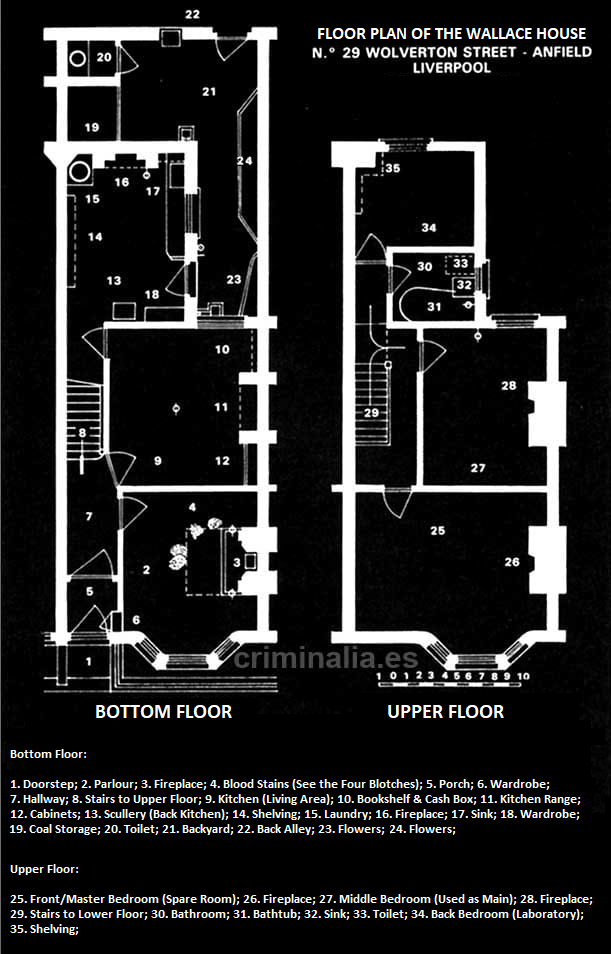
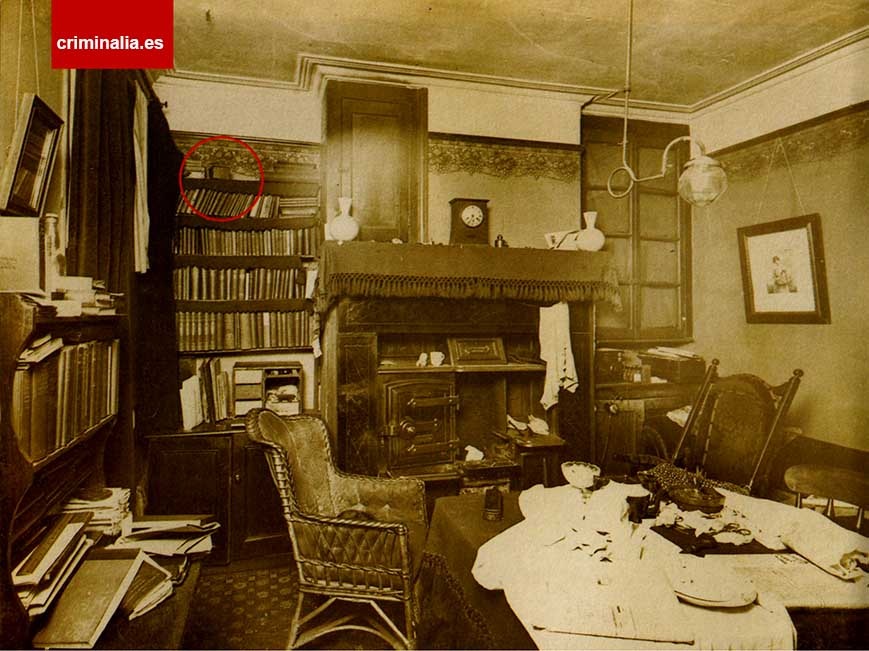
Translated from Criminalia.es.
—
Colourized Photos by Laiz Kuczynski:
29 Wolverton Street (Wallace’s Home):
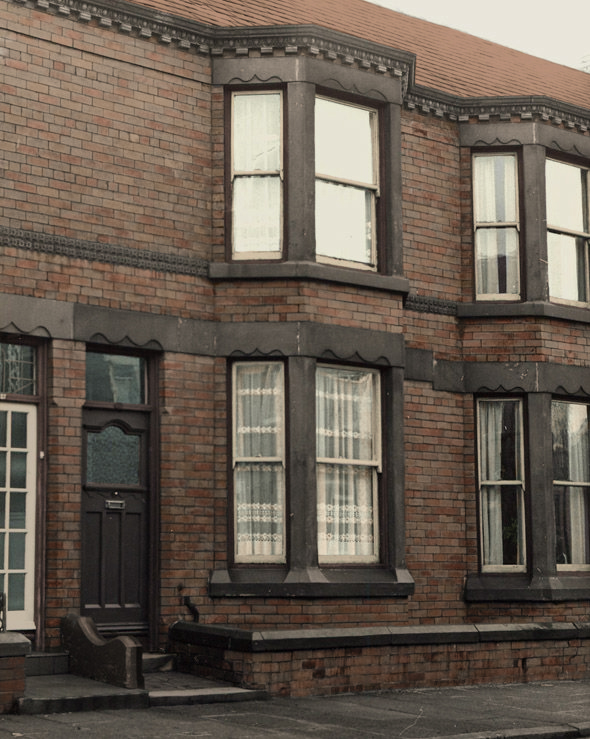
The front of 29 Wolverton Street (the black door). The house on the left belongs to the Holmes family at number 27, and on the right is the Johnston’s home, number 31.
The bottom window looks into the parlour where Julia was killed. The upper window looks into the spare bedroom which was found in disarray.
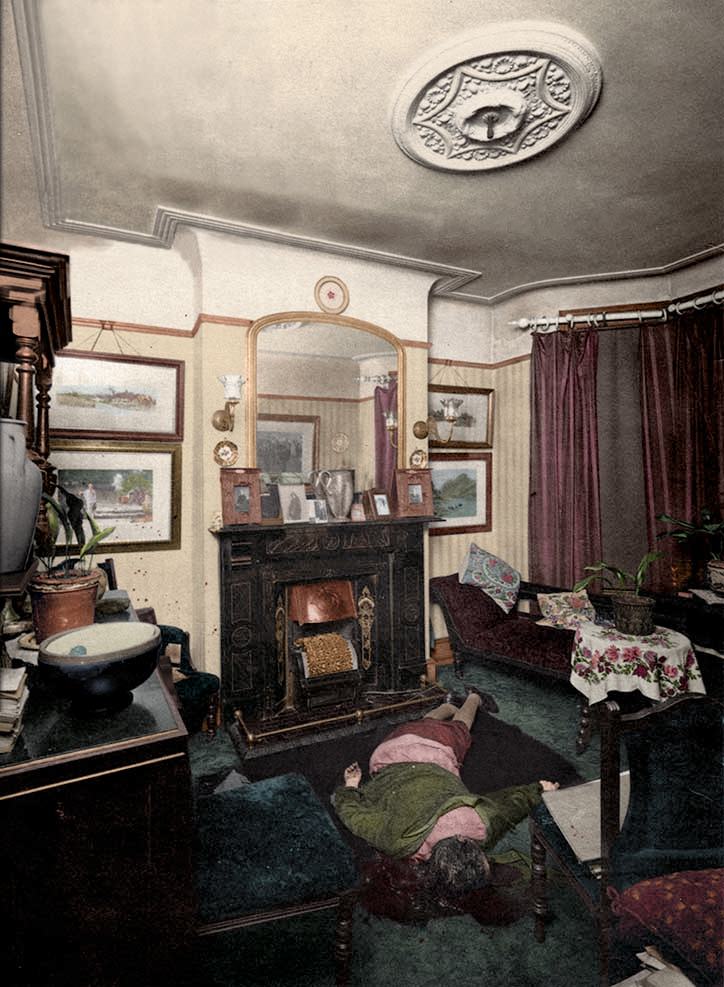
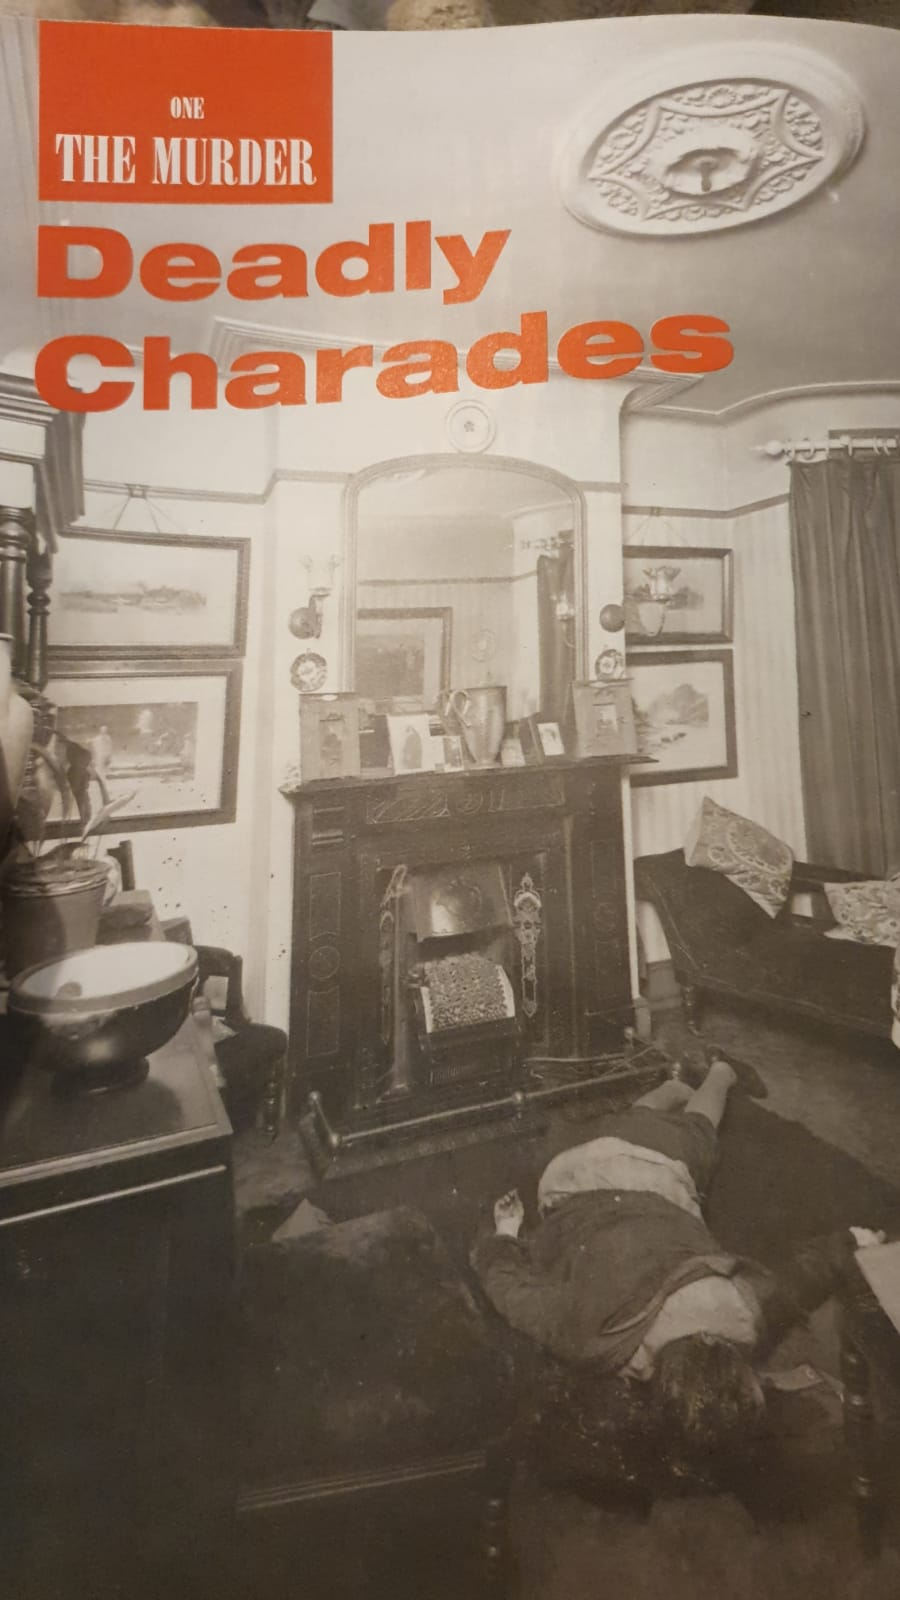
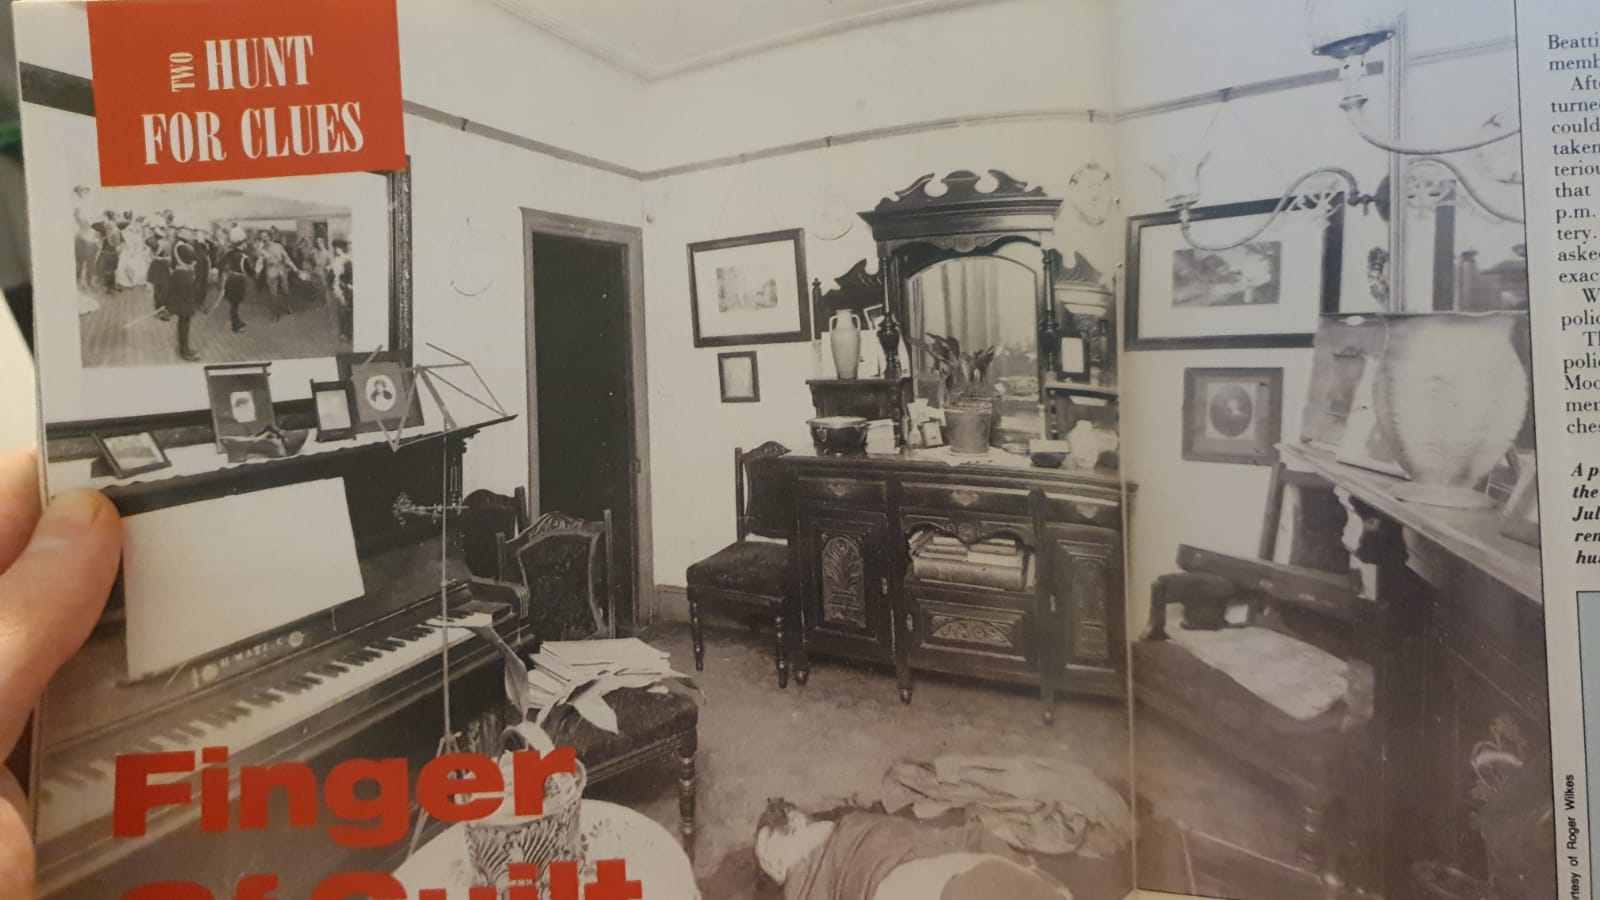
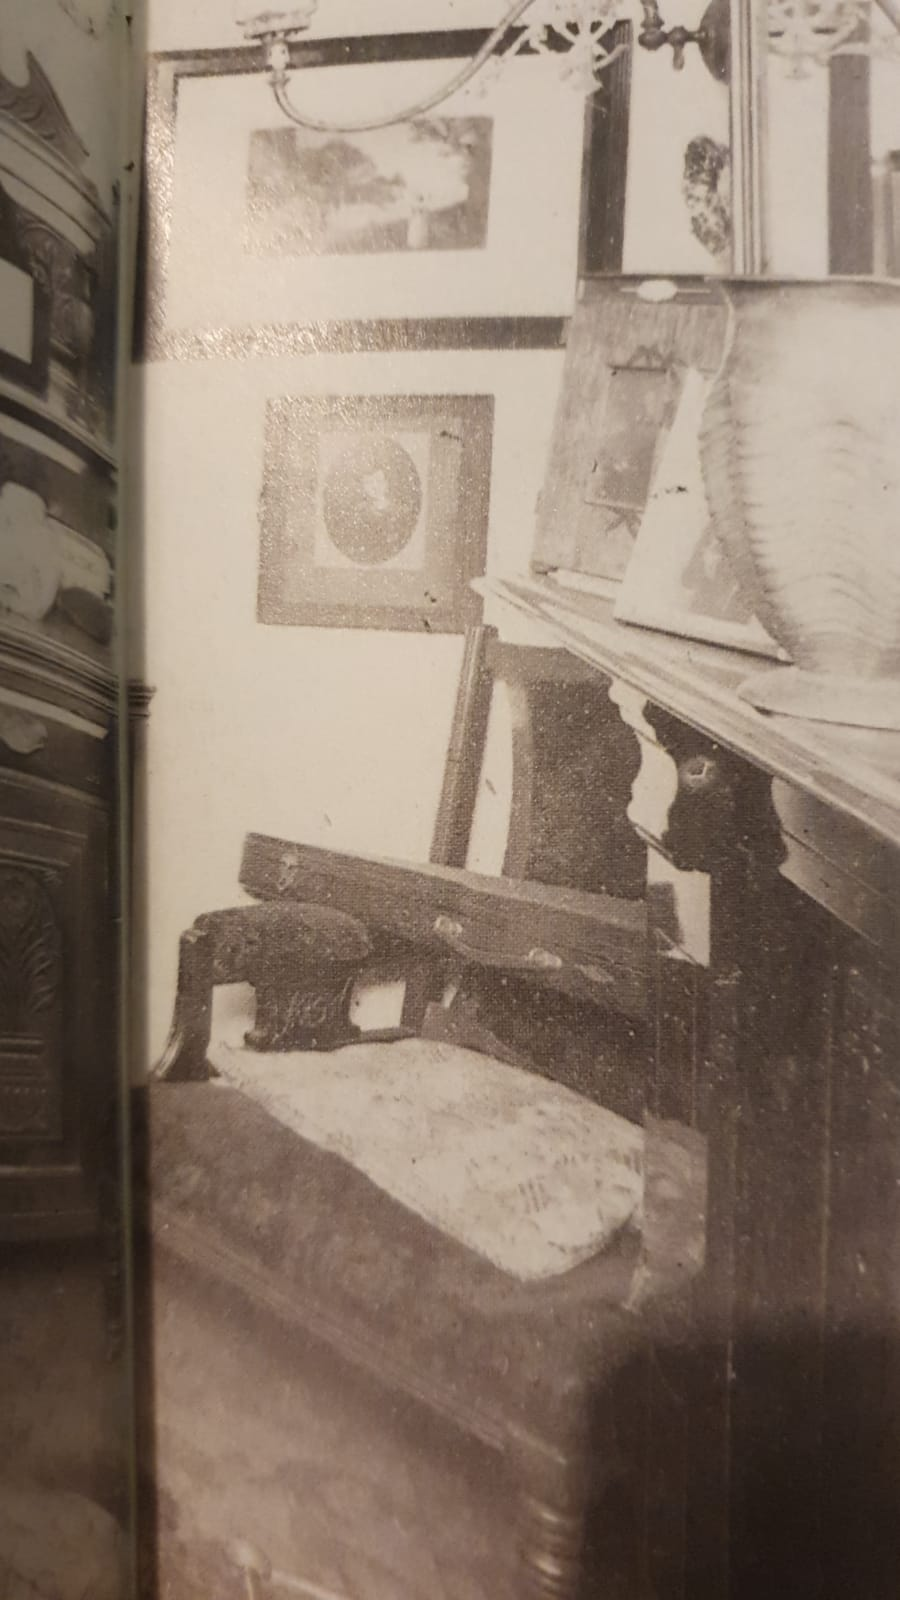
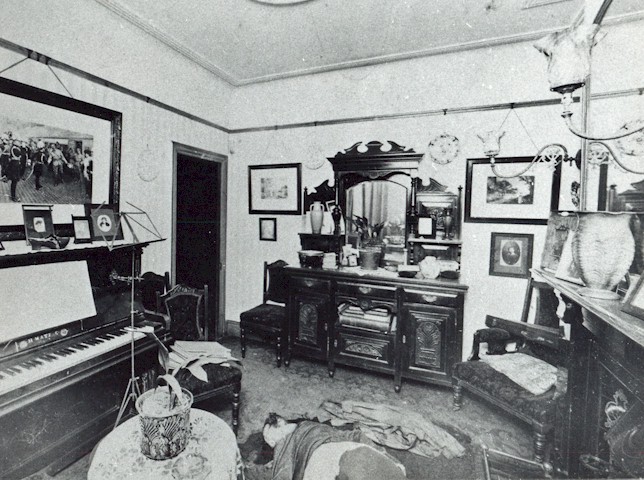
29 Wolverton Street: Parlour (Front Room) View #1.
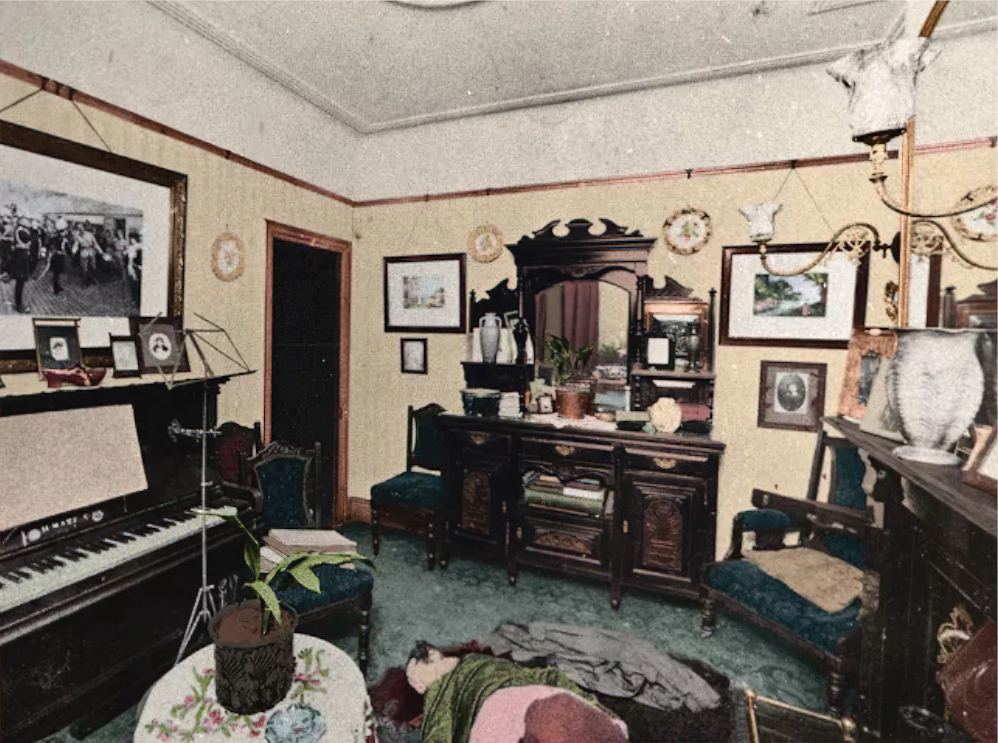
29 Wolverton Street: Parlour (Front Room) View #2.
29 Wolverton Street: The Kitchen – which functioned as the main living room (Circled: The Prudential cash box).
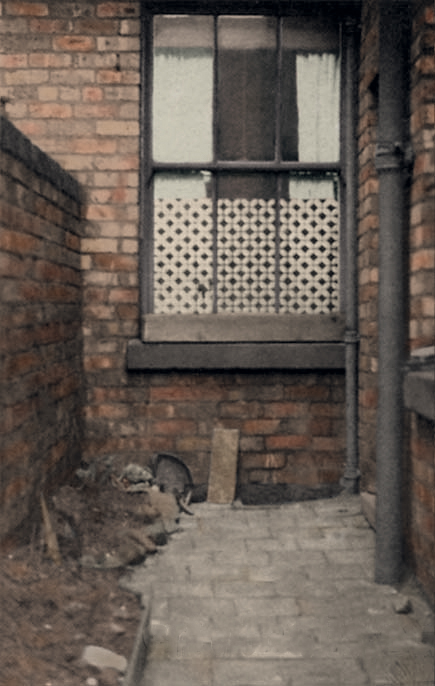
View from the yard leading to the back door into the scullery (back kitchen). The window looks into the “living kitchen” where the cash box is.
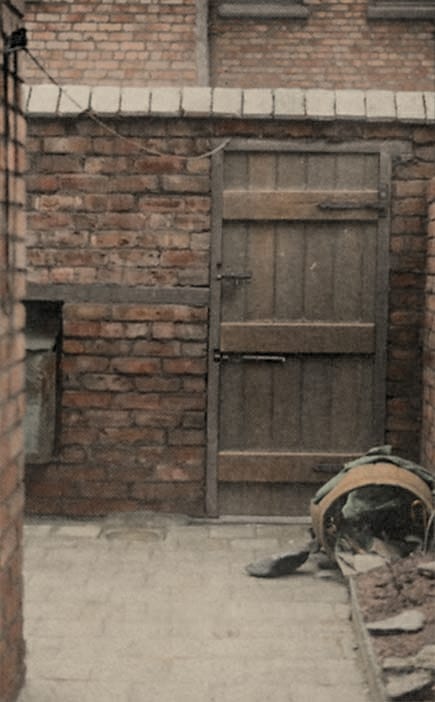
On the left you see a little bit of the dustbin, and further to the left out of sight is the outhouse.
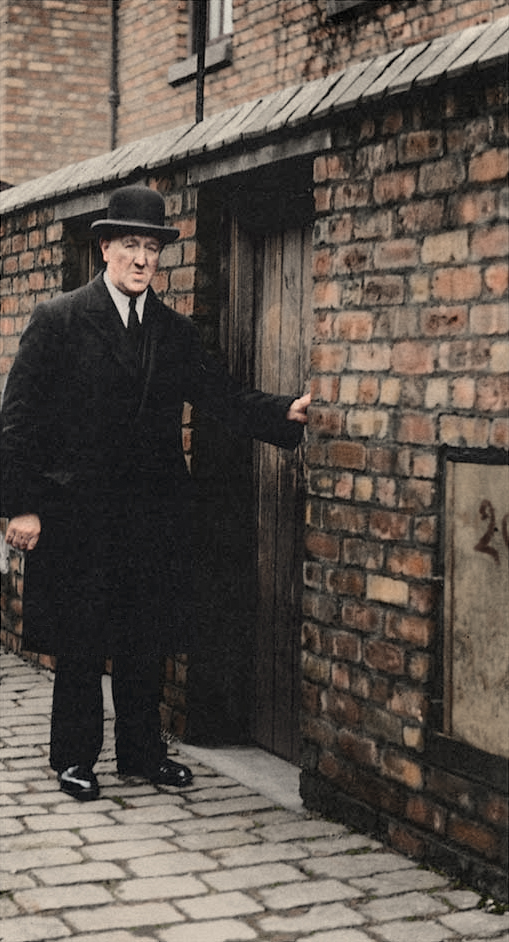
A detective in the entry at the Wallace house’s back yard door. The door to the left leads into the Johnston’s yard.
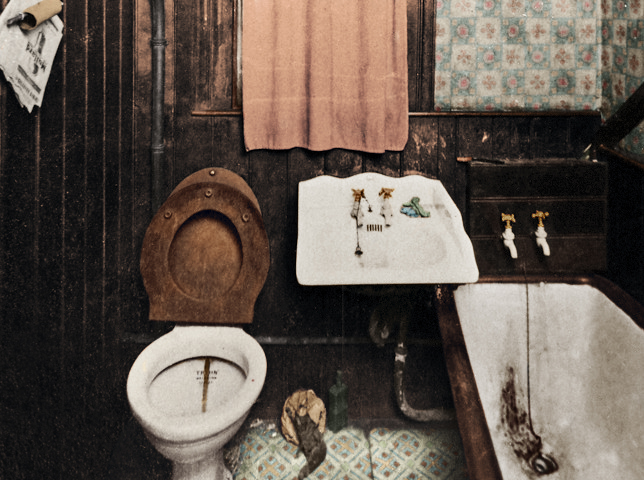
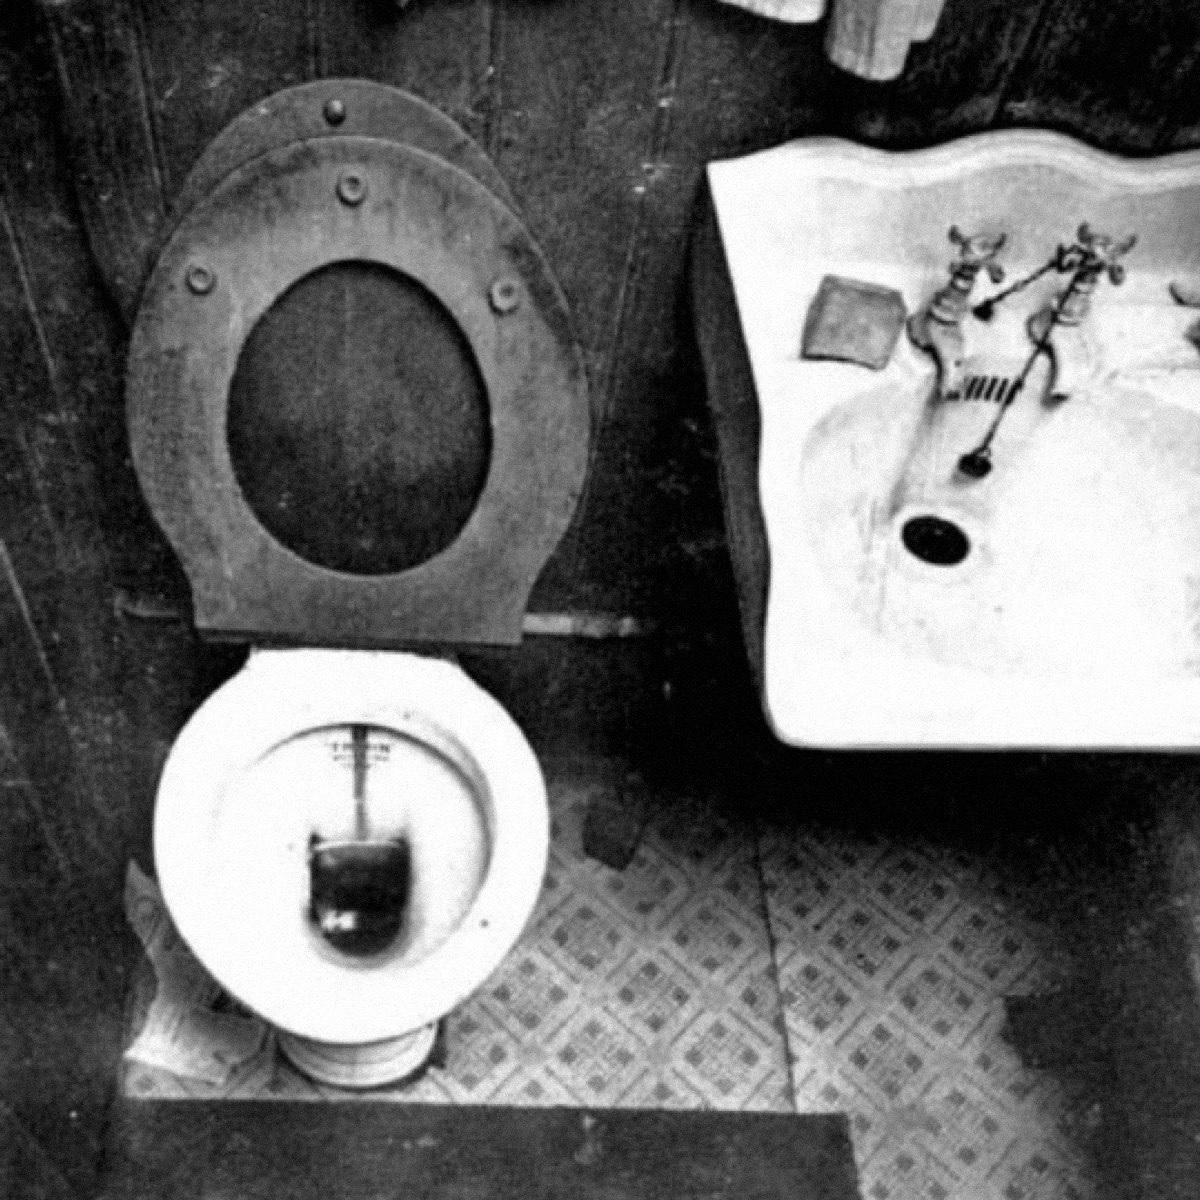
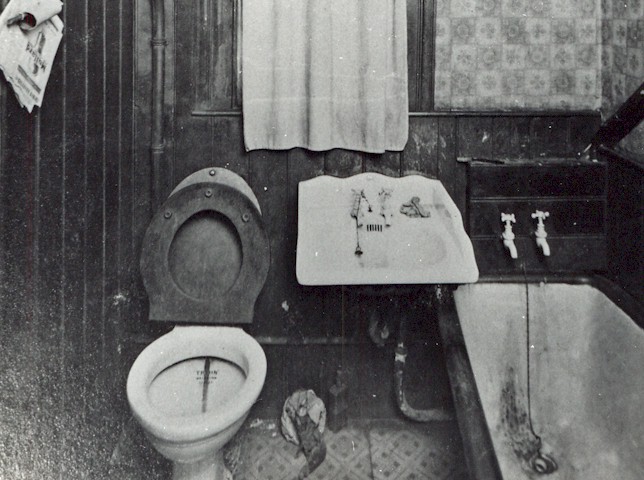
The Wallace’s upstairs bathroom.
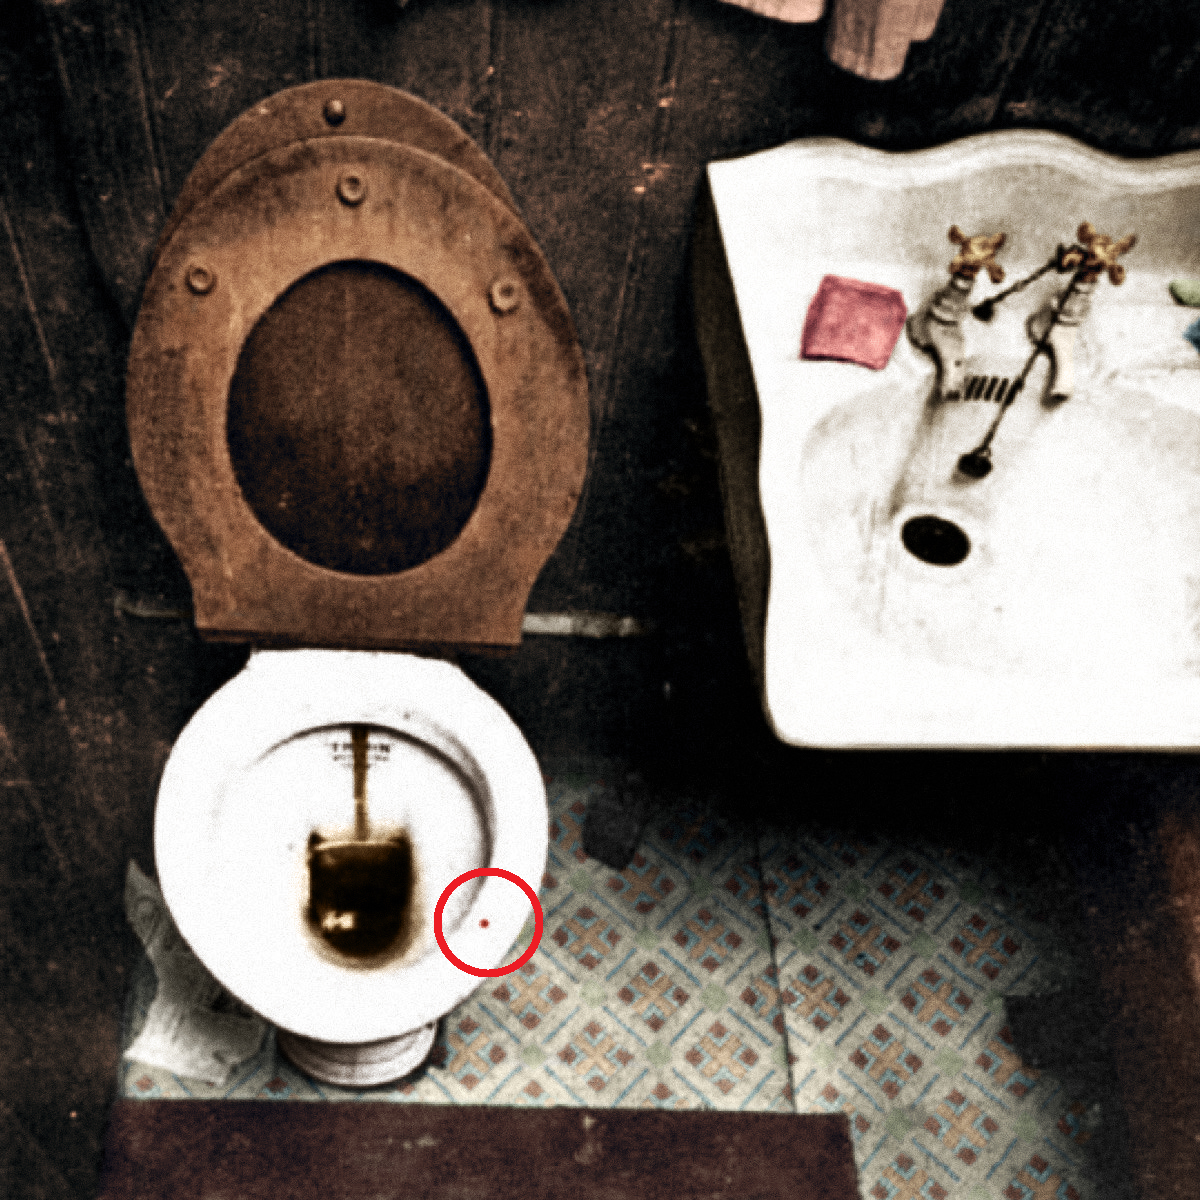
Circled: A single blood clot (I have been told to disregard this by forensics).
Other:
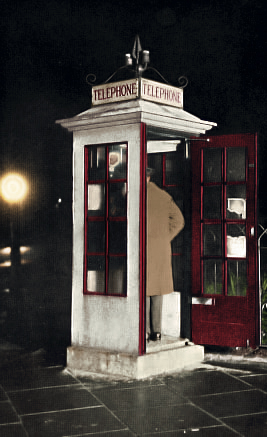
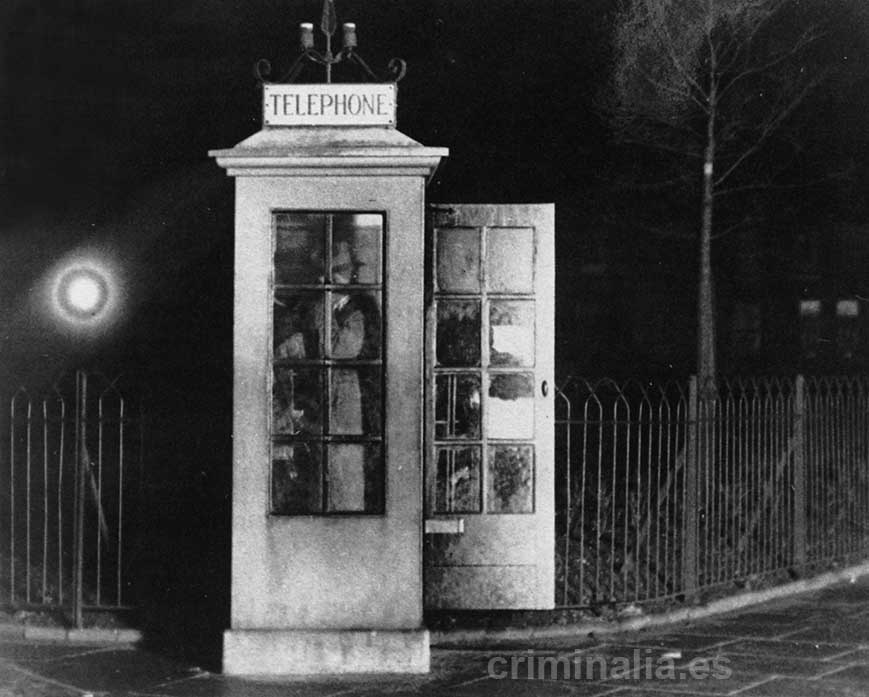
Anfield 1627: The phone box from which the “Qualtrough” call was made. This phone box was a two minute walk from Wallace’s home.
Cottle’s City Café, 24 North John Street, Liverpool.
—
Black & Whites:
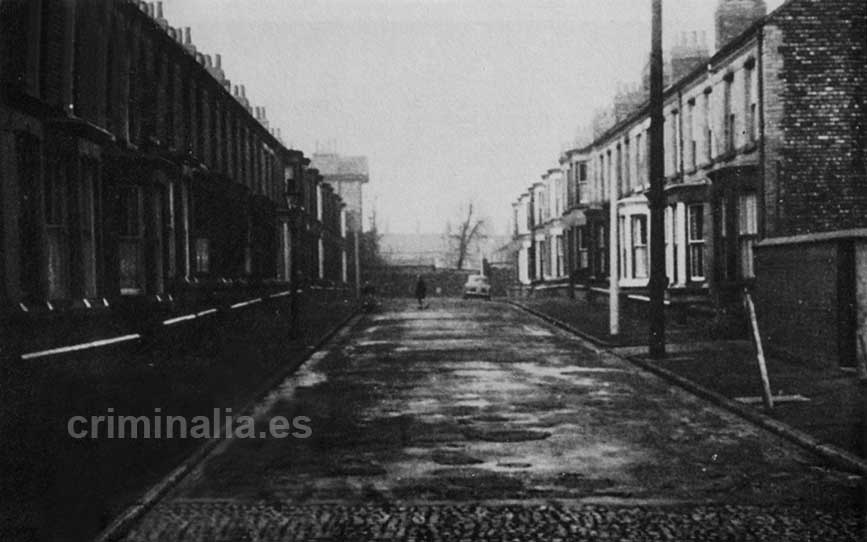
Wolverton Street –
Following are photos of Wolverton Street including crime scene photos.
View of Wolverton Street:
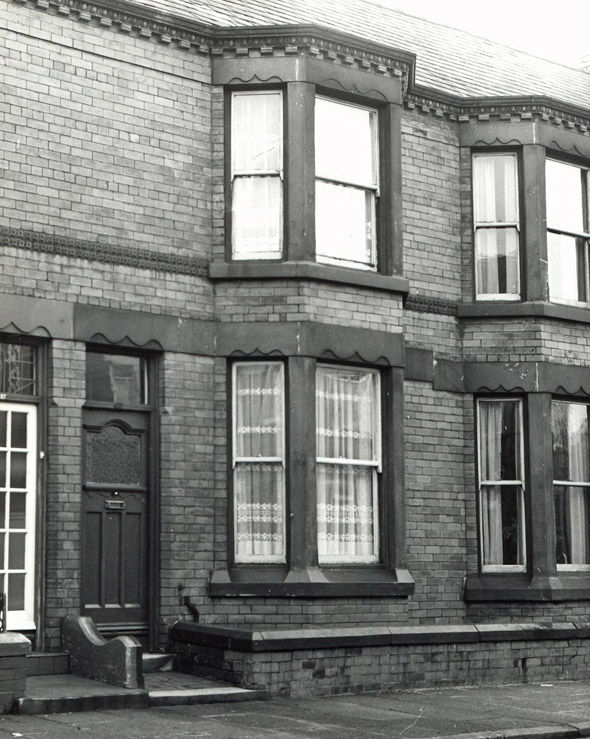
Front of 29 Wolverton Street:
The downstairs window is the window into the parlour. The upstairs window is the window into the spare bedroom, which was found in a “disordered” state (just the bedsheets pushed off the bed and the two pillows on the floor) when Wallace returned home.
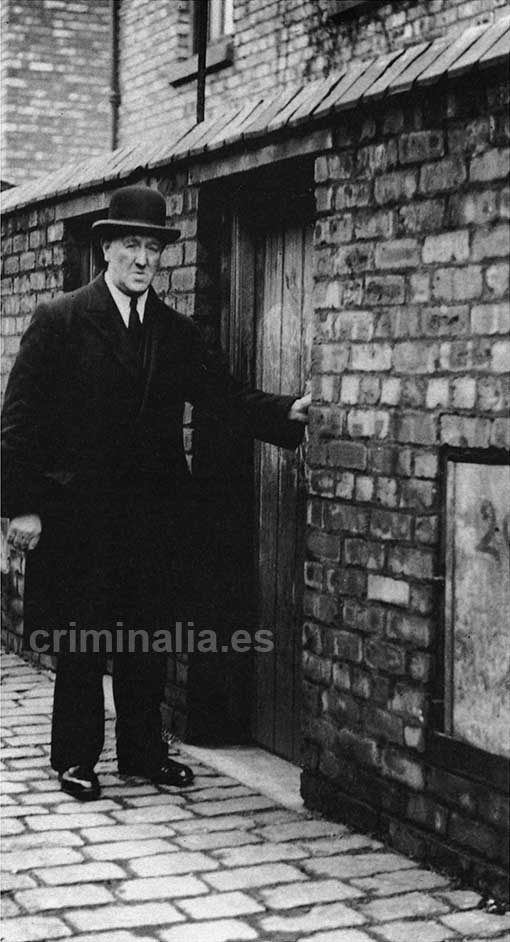
Back entry:
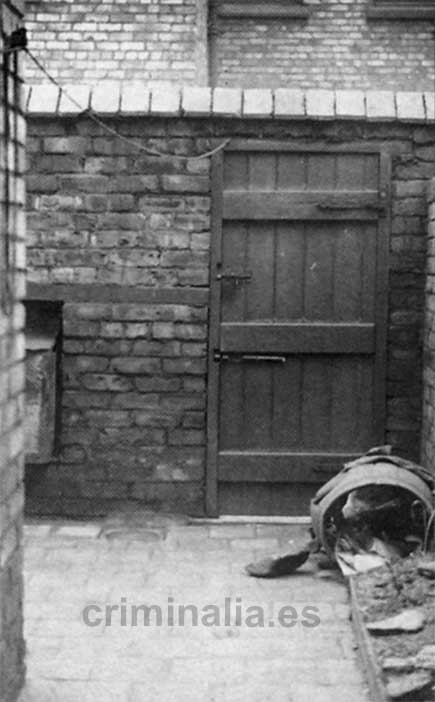
Back gate from the yard:
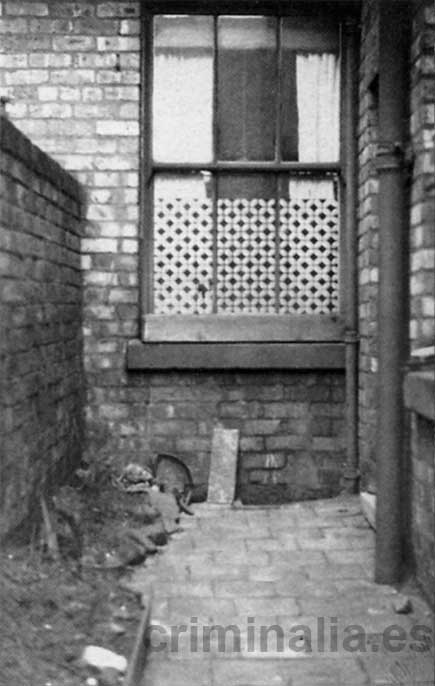
Middle kitchen window from the yard:
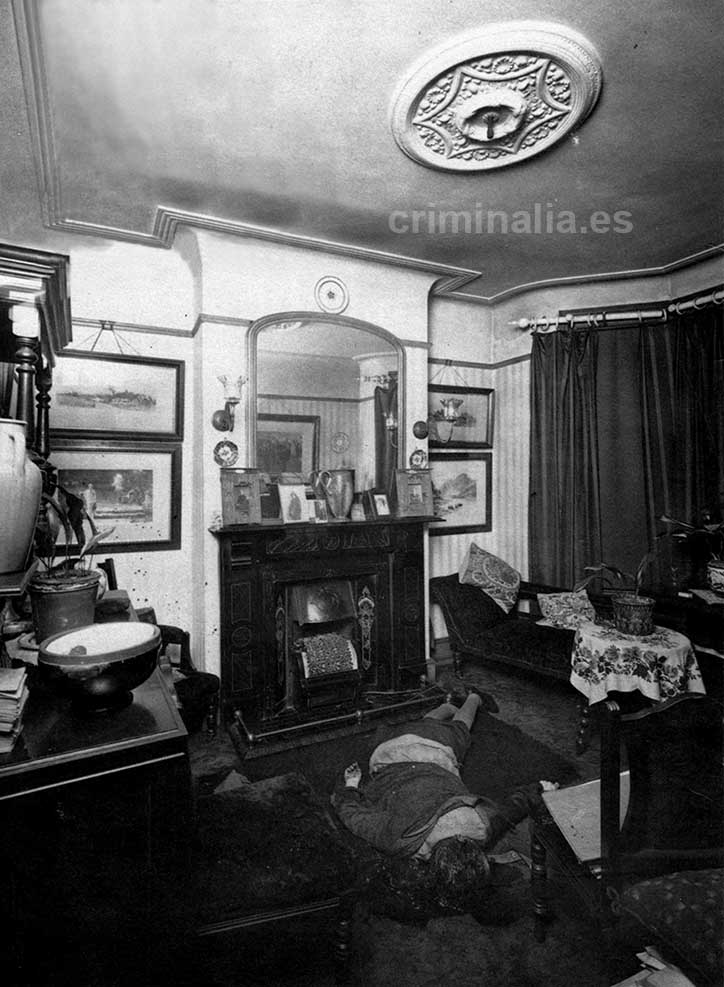
Parlour view 1:
Parlour view 2:
Forensics expert McFall believed Julia was sitting perched on the front of the armchair to the left of the fireplace (the chair on which the violin case is laid across the armrests). He said he believes she was sitting forward with her head turned slightly to the left – as though in conversation – when she was first struck.
During questioning from Roland Oliver K.C. (Wallace’s defence), he admitted it is also possible Julia was bending down to light the fireplace when first struck.
I should point out that the metal stand in front of the piano is a violin stand, and the violin case is across the arms of the armchair as seen here:
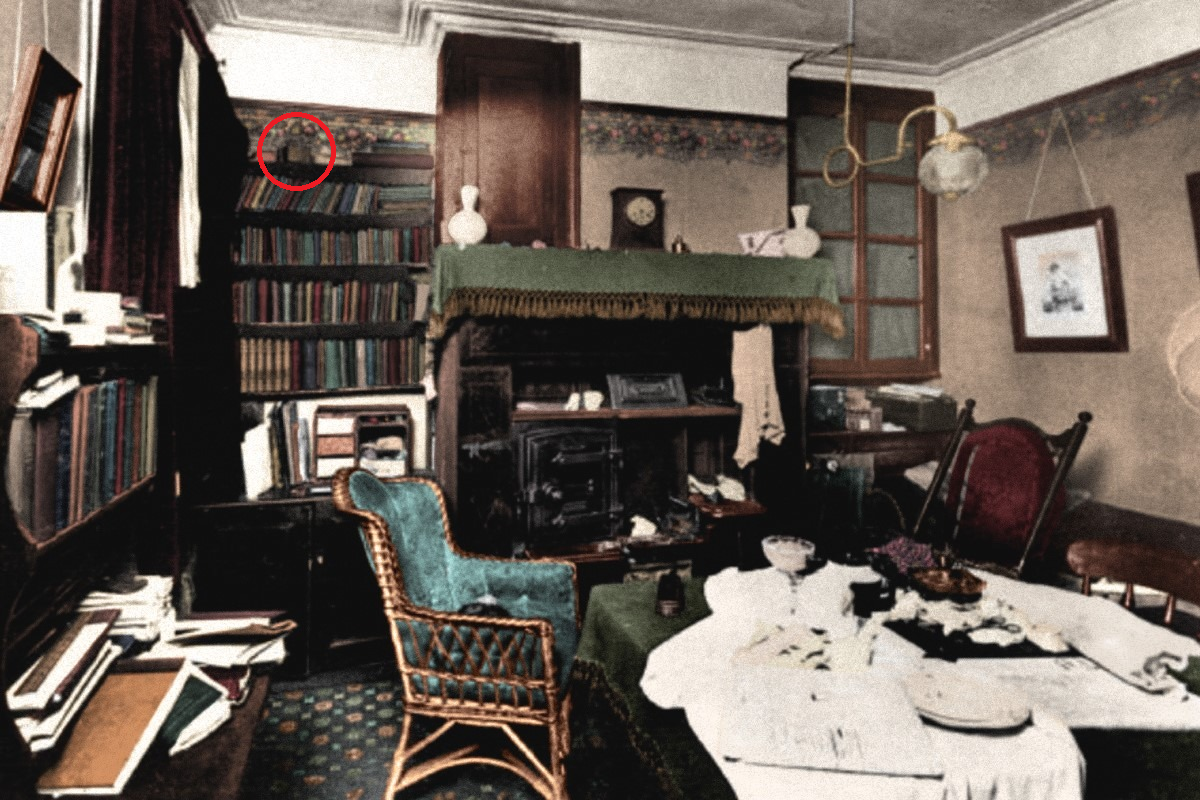
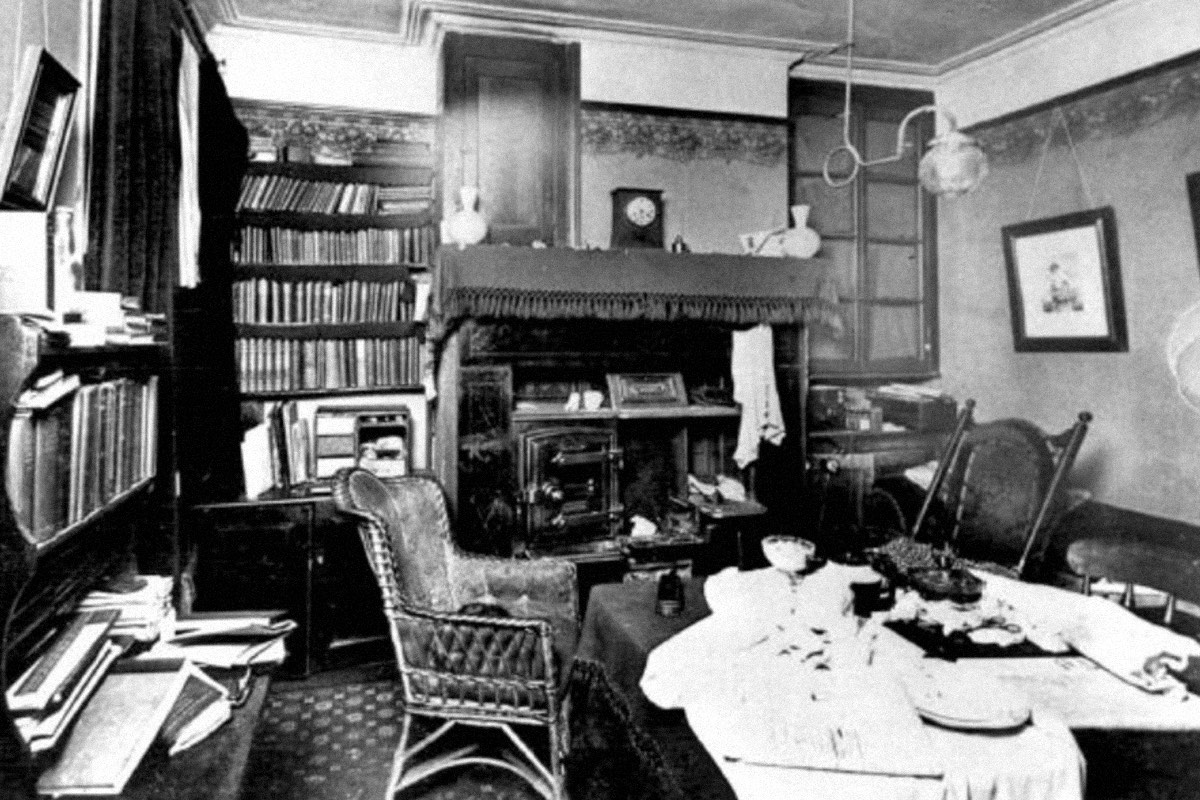
Living kitchen:
Same photo, different quality. The cash box is circled in red on the first photo.
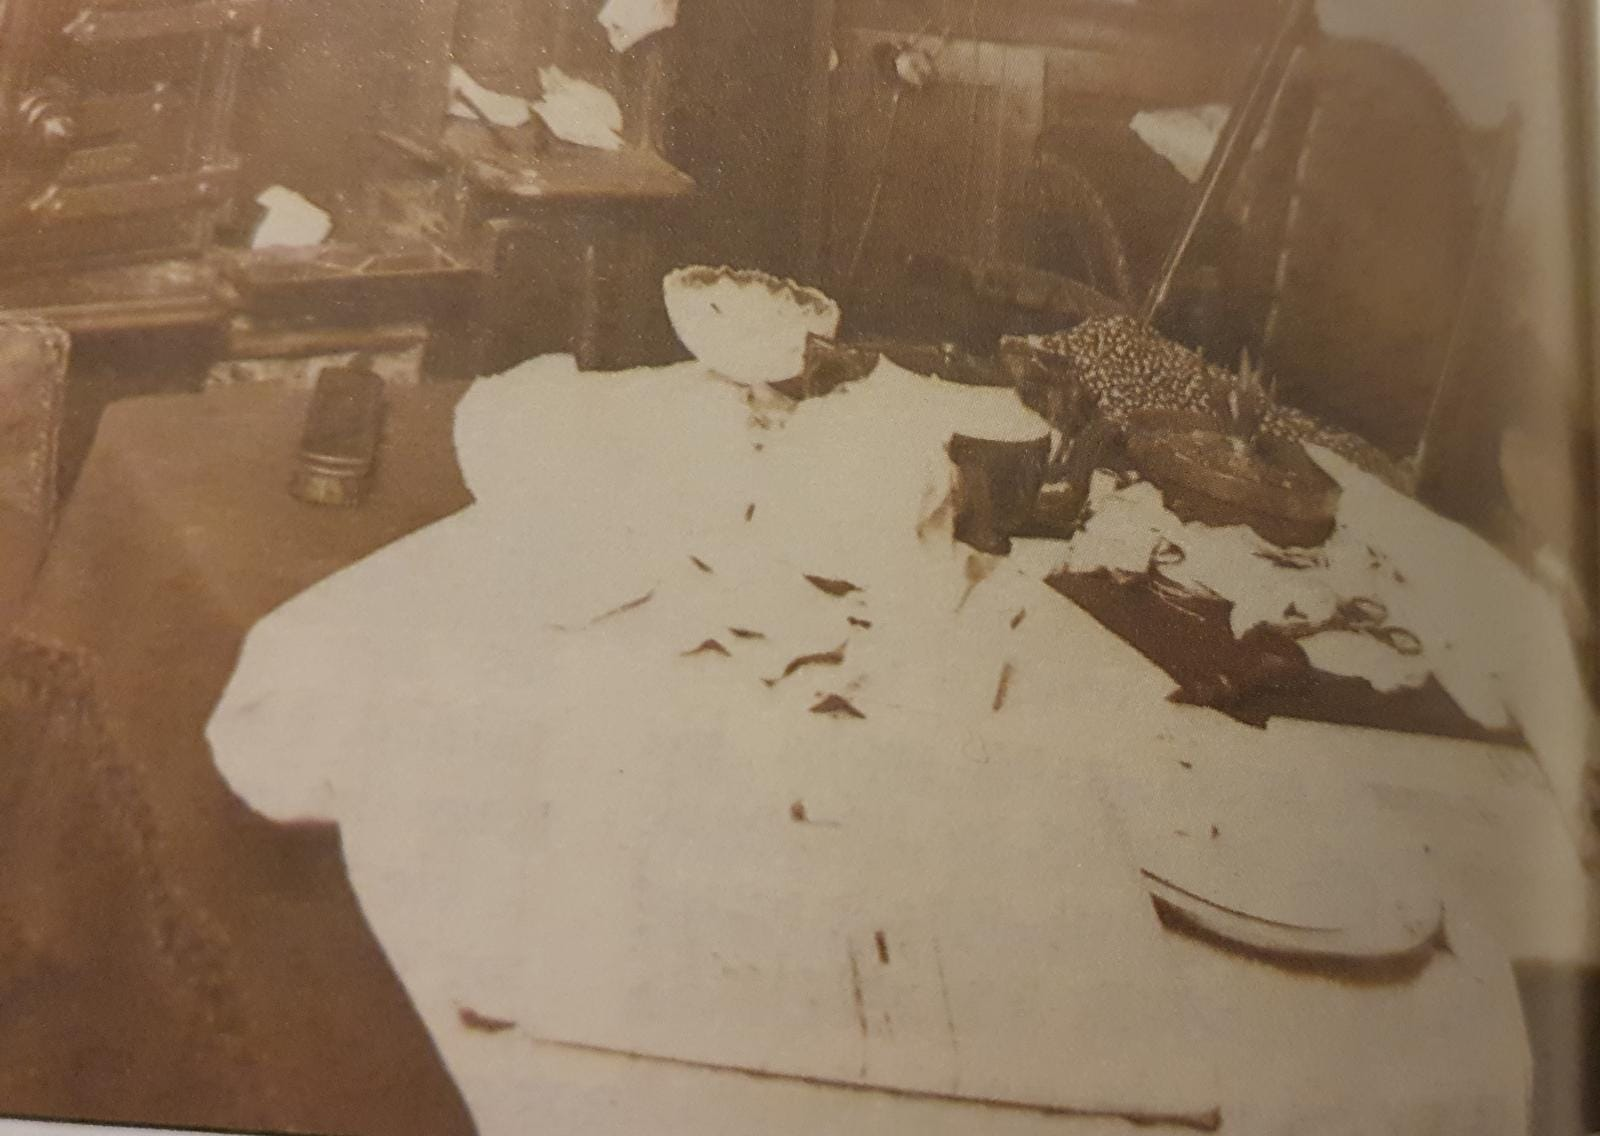
Living kitchen (close-up of table contents):
Upstairs bathroom:
—
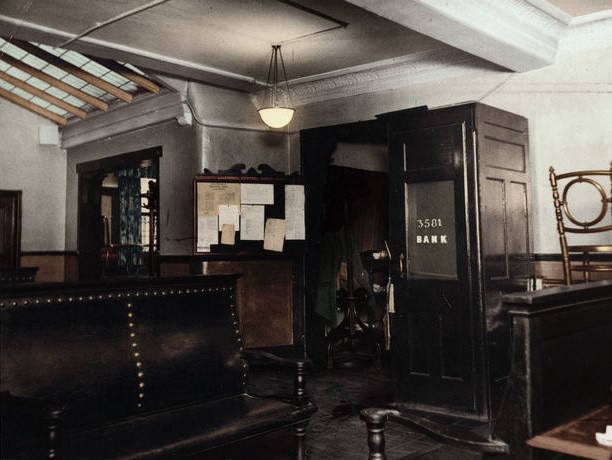
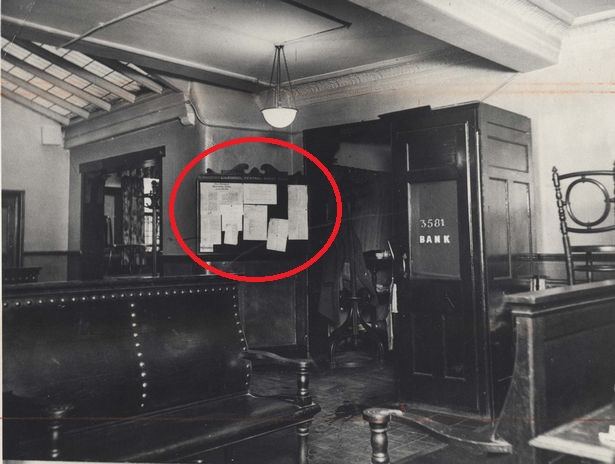
Cottle’s City Café (Liverpool Central Chess Club):
Following are photos from Cottle’s City Café, where the Qualtrough phone call was received. According to waitress Gladys Harley, the café could expect to receive about 100 visitors per day.
Café interior (noticeboard circled in red):
The telephone number of the Café (Bank 3581) can be seen inscribed on the window to the right of the noticeboard.
Noticeboard (on which the chess schedule was pinned):
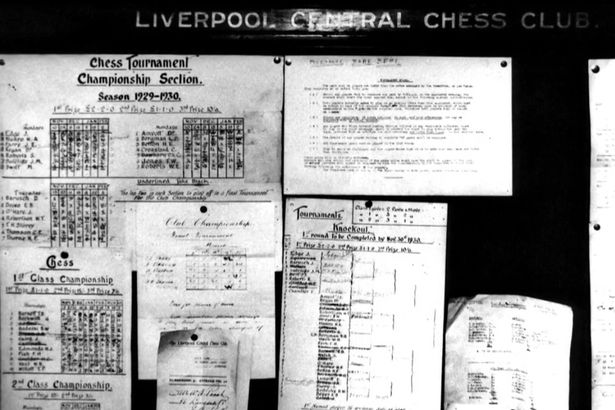
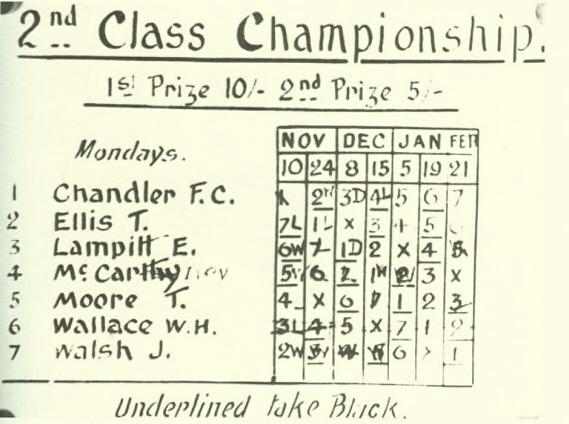
Chess schedule (pinned to the noticeboard in Cottle’s City Café):
—
Phone Booth (Anfield 1627), and Other Noteworthy Areas –
Following are images of the phone box (Anfield 1627) from which the Qualtrough call was made, as well as other noteworthy locations.
Phone booth view 1:
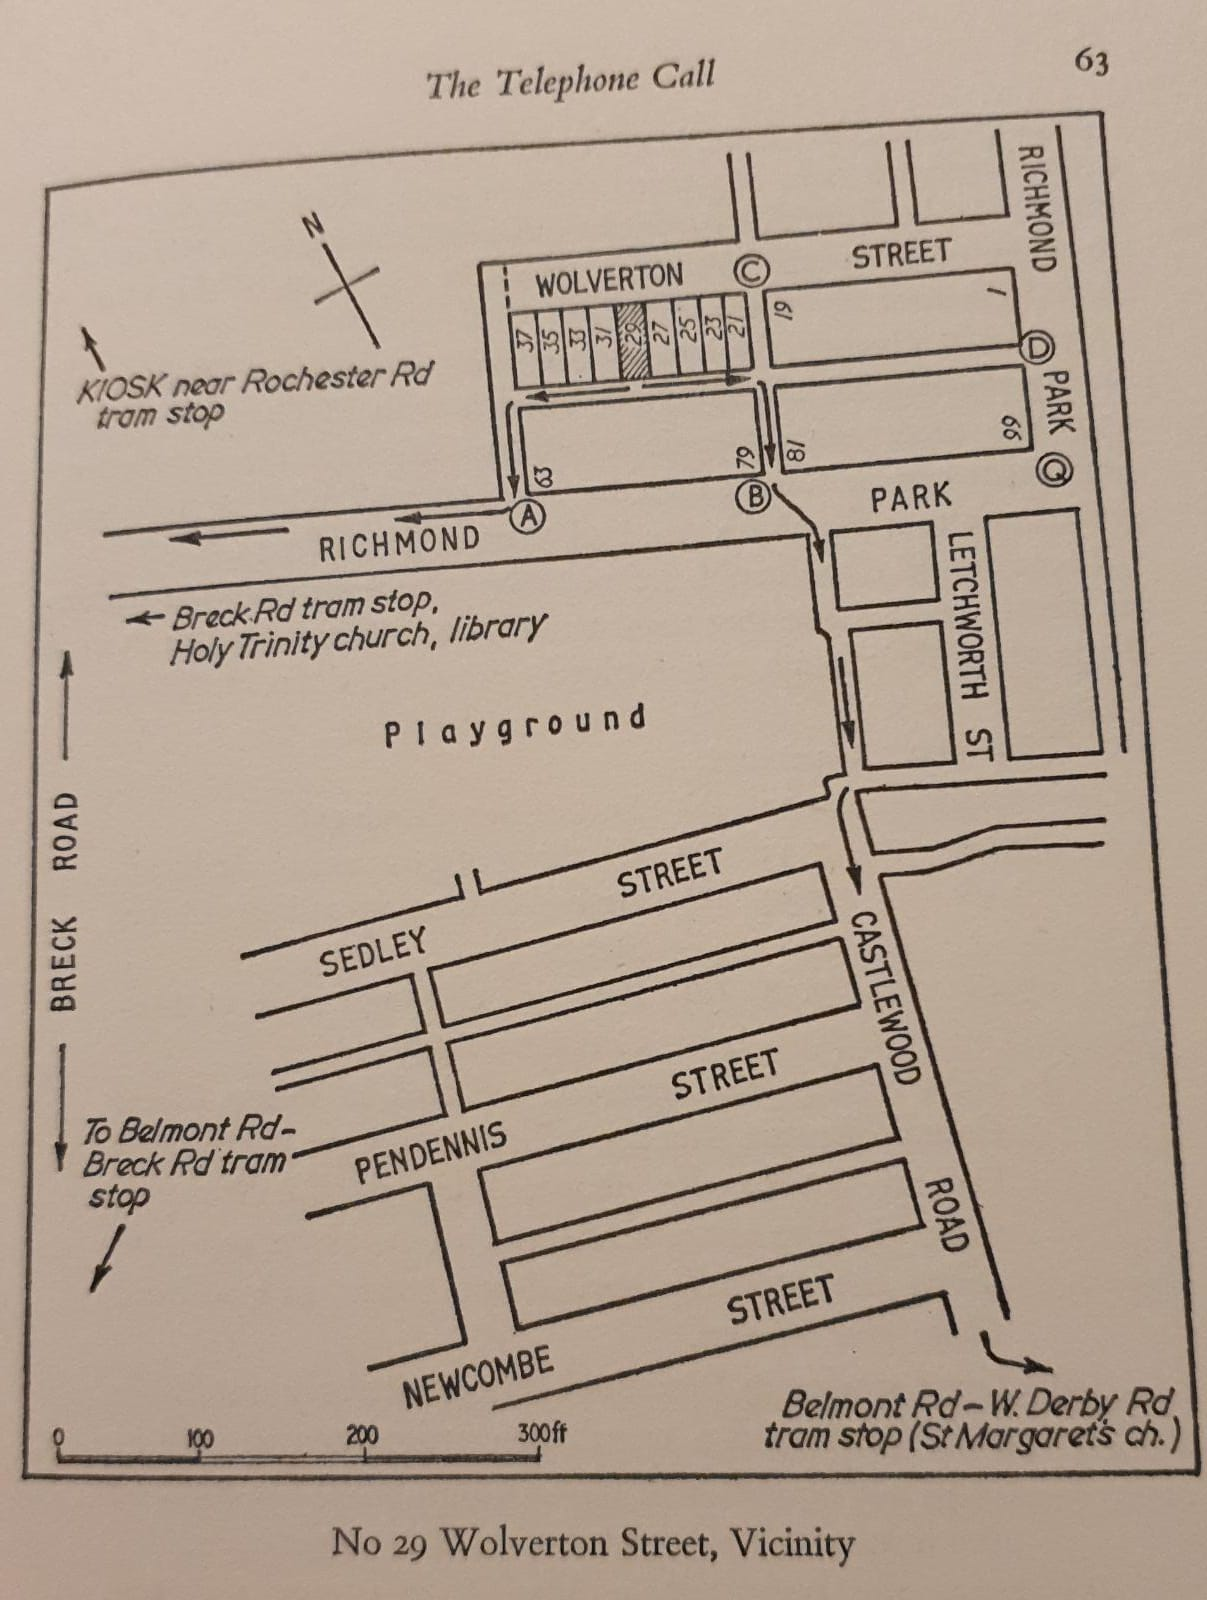
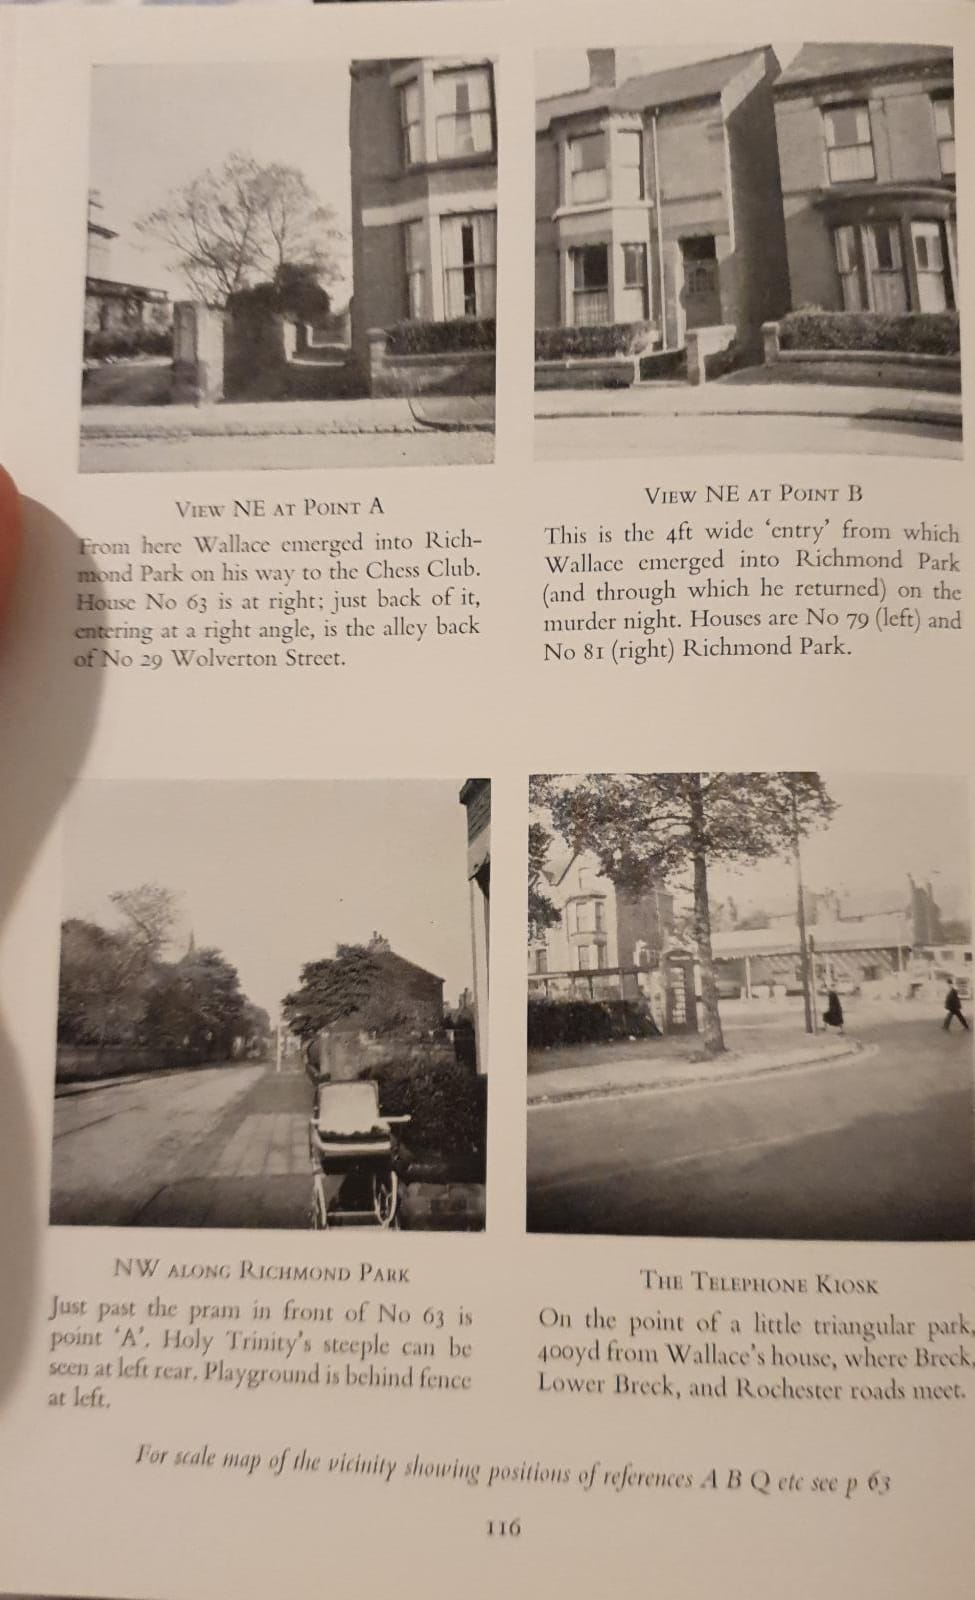
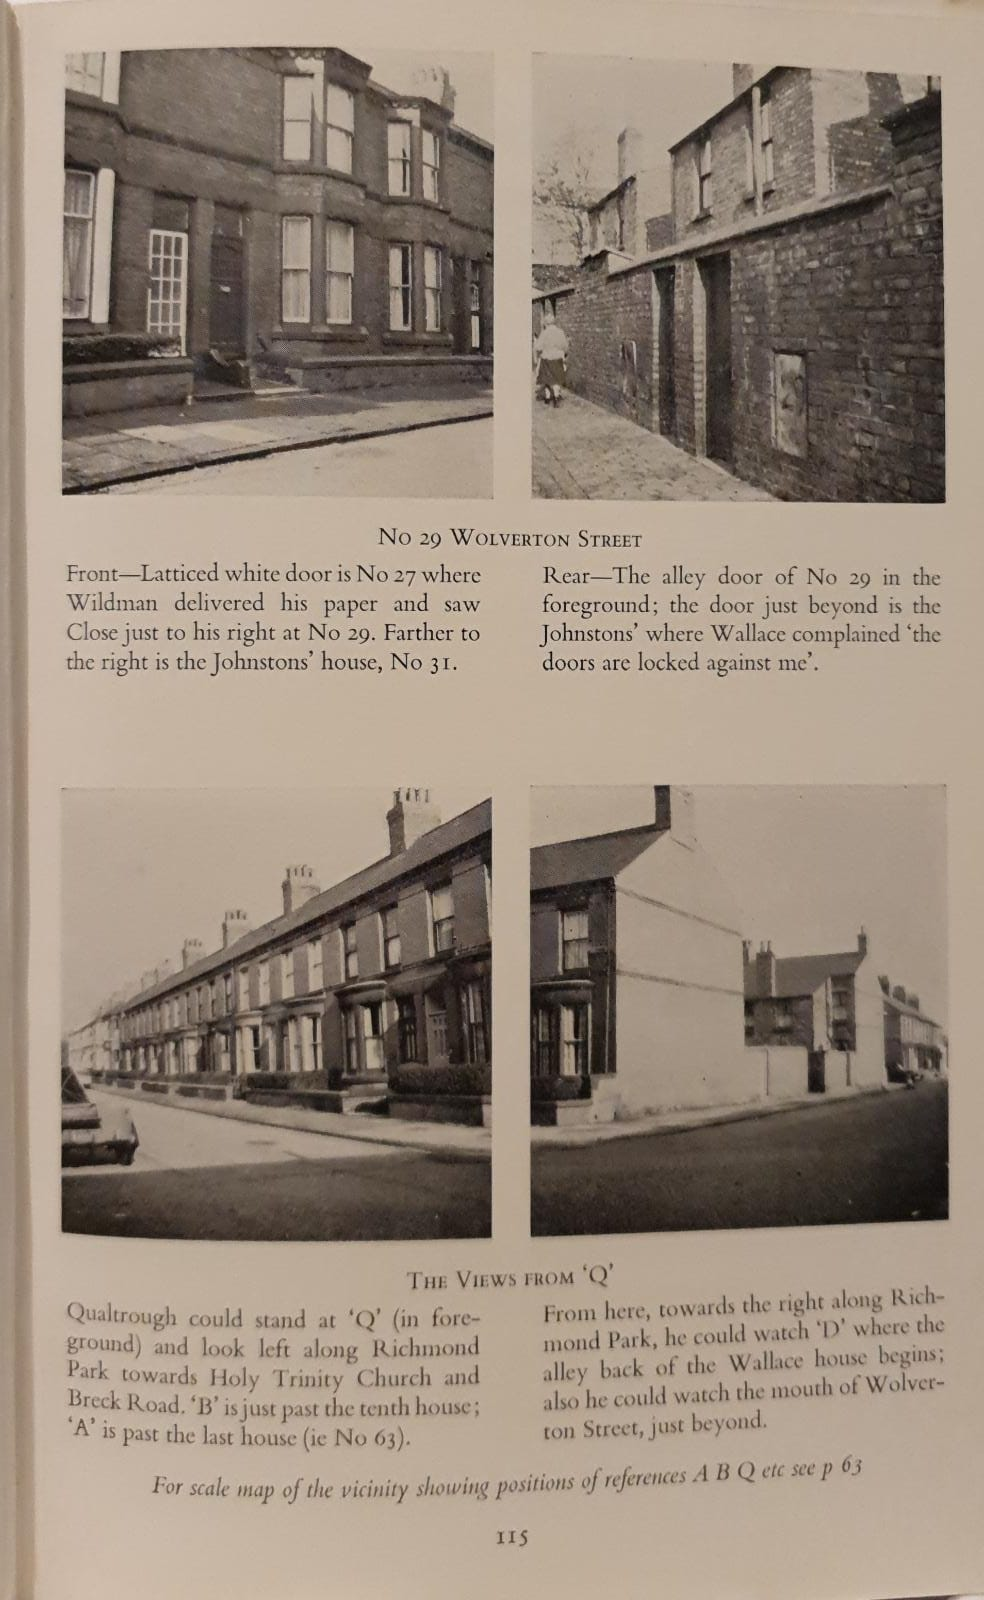
Map and Photos by Robert F. Hussey:
Includes the route Wallace took to the tram stops, and markings which correspond to the following contemporary photos.
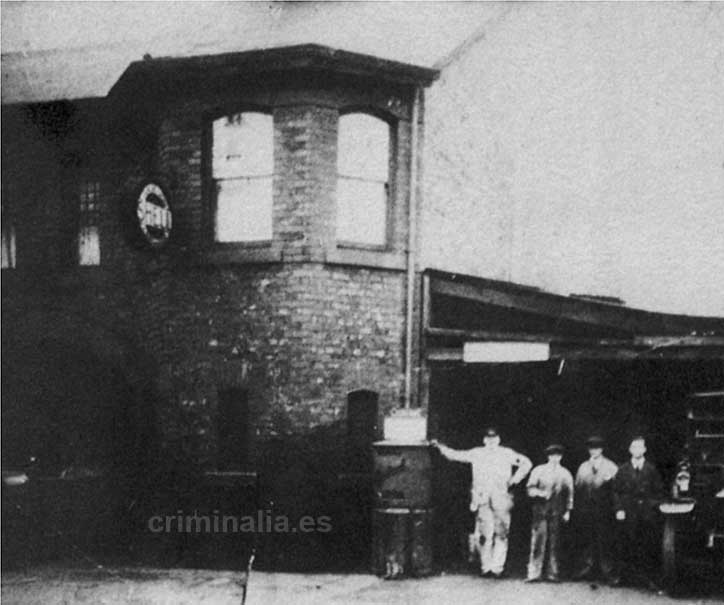
Atkinson’s garage:
John Parkes claims Richard “Gordon” Parry came here on the night of the murder requesting his car be hosed down inside and out. Parkes claims he found a blood-soaked mitten in the glove compartment of the car (to which Gordon responded “if the police found that, that would hang me”), and that Gordon told him he disposed of the murder weapon – an iron bar – down a grid outside the doctor’s surgery on Priory Road.
—
AI Megasized Photos
Not as good as owning Murder Casebook No.25 and an LED magnifying glass, but these photos have been megasized by Topaz Studio AI, so you can zoom very far into the image. Detail may be odd in places as a result of the processing.
Click the images to view in full size, or save them to your device.
![]()
![]()
![]()
![]()
![]()
![]()
![]()
![]()
Hi Lin. If you are on facebook you might be interested in joining 'The Murder of Julia Wallace' page too.…